Category: Navigation

Cross Listing (Combining Sections)

Cross – Listing – Quick Steps

  • Click into parent course, copy the number from the end of the course’s URL from it’s home page.
  • Click into child course, click settings, click sections, click the section name of course and select Cross – List on the right, enter the id number you just copied from parent.
  • That’s it!


While we are talking about hacks

This link will bring you to 20 but I thought these were pretty neat

Grade rollbacks

If you’ve made errors while entering grades (and who among us hasn’t accidentally found ourselves entering grades in the wrong column before?), the grade rollback feature might be your new best friend. In your gradebook, if you click on the gear wheel in the top left, the first item on the drop-down menu is “view grading history.” Like with page rollbacks, this allows you to revert back to the previous save point.

Display multiple documents side-by-side using a table

If you have multiple documents you would like your students to be able to look at side-by-side, insert a blank table on your page and then insert a document into each cell. Students can click on one document at a time to view it full screen or can scroll through documents right next to each other to compare and contrast them.

Getting set up for Spring

Whether you are using Canvas for the first time or teaching a specific course for the first time this Spring in Canvas, here is a tip if you have archived content from Blackboard import it into one of your Sandbox Courses (you have 4) and then copy what you need into your Spring Course.

Canvas Trainings from Canvas can be found here

Canvas Basics

First Look

December Calendar

These can also be accessed via Canvas’ training portal once logged into Canvas.

Stay in the know!

All faculty are enrolled in our Canvas Orientation course. In addition to being a training resource, we’re also using this course to communicate information about new features, special training events and other important updates.

Be sure to enable course notifications so you’re in the know about Canvas.

Today’s announcement –

October 7 | 2:00pm-3:00pm | Join the Teach with Teams session (Links to an external site.)

More than 60 participants attended our first Teach with Team session. By the end of the session, participants were giving presenter Jennifer Jury (Links to an external site.), Microsoft Learning Consultant, threads of positive feedback and appreciation for a great session.

Topics: Creating meetings in Canvas; Setting meeting permissions; Meeting features (attendance reports, breakout rooms, whiteboards); Presentation tips: Ending a meeting versus leaving a meeting; Sharing meeting recordings.

Maybe I will move?

Now to Canvas, Spring Courses are available to you when you login.  You can easily export your BB content to Canvas.

From the Continuity plan –

  1. “Attend Canvas Training and review Canvas Guides & Overview Videos.
    2. Migrate your course to Canvas now.
    3. Test the communication, web conferencing and recording tools.
    4. Add a continuity statement to your syllabus, for example,
    “In the event of a campus emergency that disrupts academic activities, course
    requirements, deadlines, and grading percentages are subject to change. Information about changes in the course will be communicated as soon as possible by email, and on Canvas. If we are not able to meet face-to-face, students should log onto Canvas and read any announcements and/or access alternative assignments. Students are encouraged to continue the readings and other assignments as outlined or this syllabus or subsequent syllabi.”
    5. Make sure your syllabus contains enough information each week such that students could continue on their own for a short period of self-study if needed.
    6. Move files needed for instruction to Microsoft OneDrive.  Remember to give students access to correct folder.
    7. Download the software you may need to work off campus.
    8. Visit the Virtual Computer Lab to determine if tools your students need are available.
    9. Reach out for a consult now to get help thinking through teaching strategies.
    10. Request an accessibility audit to ensure all students can use your digital files.

Dog Days? No!

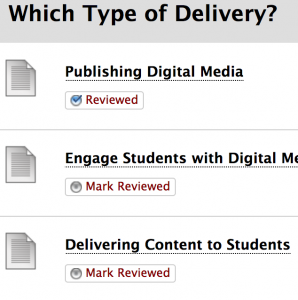
Time to learn some new tricks! Want to know if students have looked at something, click on the contextual arrow next to the item and enable Review.  Advise students to check after reviewing this not only gives you an indication but also reminds students what they have opened and what still needs to be opened.  Go one step further using Adaptive Release and have a quiz or another item appear once Review is checked.

Have Review next to Syllabus and upon checked have a short Syllabus quiz become available to the students!


A new BB Tool

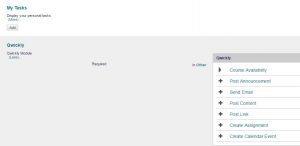
Tagging onto my colleague’s email today check out this new tool Qwickly

“Qwickly allows faculty to make courses available, send emails, post announcements, and post content to multiple courses at once.”

After logging into Blackboard click the Add Module option in the upper left corner and then scroll (it’s in alphabetic order) to “add” the Qwickly tool!

Great timesaver!

qwickly

Organize Your Course and Students Using The New Blackboard Calendar Tool

Organize Your Course and Students Using The New Blackboard Calendar Tool

To be successful in online courses, students must quickly learn to be organized. In fact, organization is the key to a successful learning environment. Without organization, students quickly become derailed from the course timeline and must spend their time playing catch-up. Typically, students are enrolled in more than one course and instructors are teaching more than one course. One organizational challenge that both instructors and students face is keeping track of all of the assignments and due dates in all of their courses.

Click here for more

Hopping on the Bandwagon!

Not the Easter Bunny but joining my Blackboard Support colleagues in support of the new “Section Merge Tool” available to you. Now you can copy content to a specific course and then merge your sections to that same course.  You will also receive an email once the copy has taken place.  So no more wondering has it been done, did the click take or not!  So click once and wait for the email.  Need assistance in completing these tasks just contact OET!  Here are links to the videos

Copy Content http://www.ecu.edu/blackboard/Copy/Copy.html

Collapse Sections http://www.ecu.edu/blackboard/collapse/collapse.html

Collapse Sections and then Copy Content http://www.ecu.edu/blackboard/Collapse_Copy/Collapse-Copy.html